
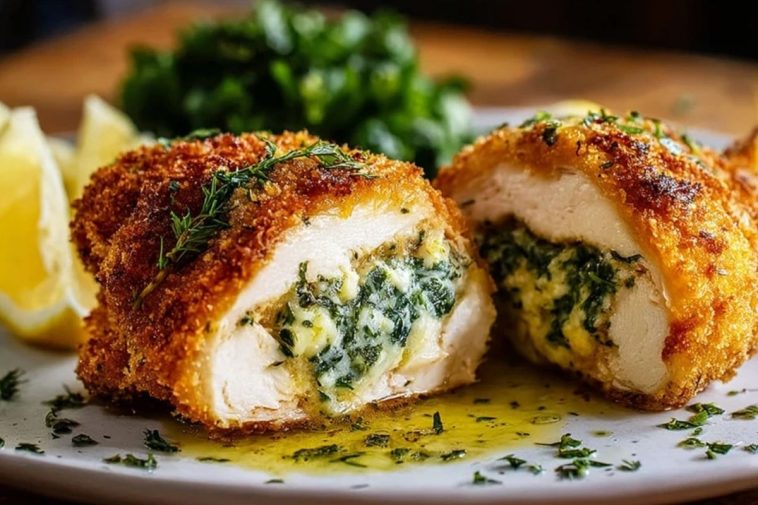

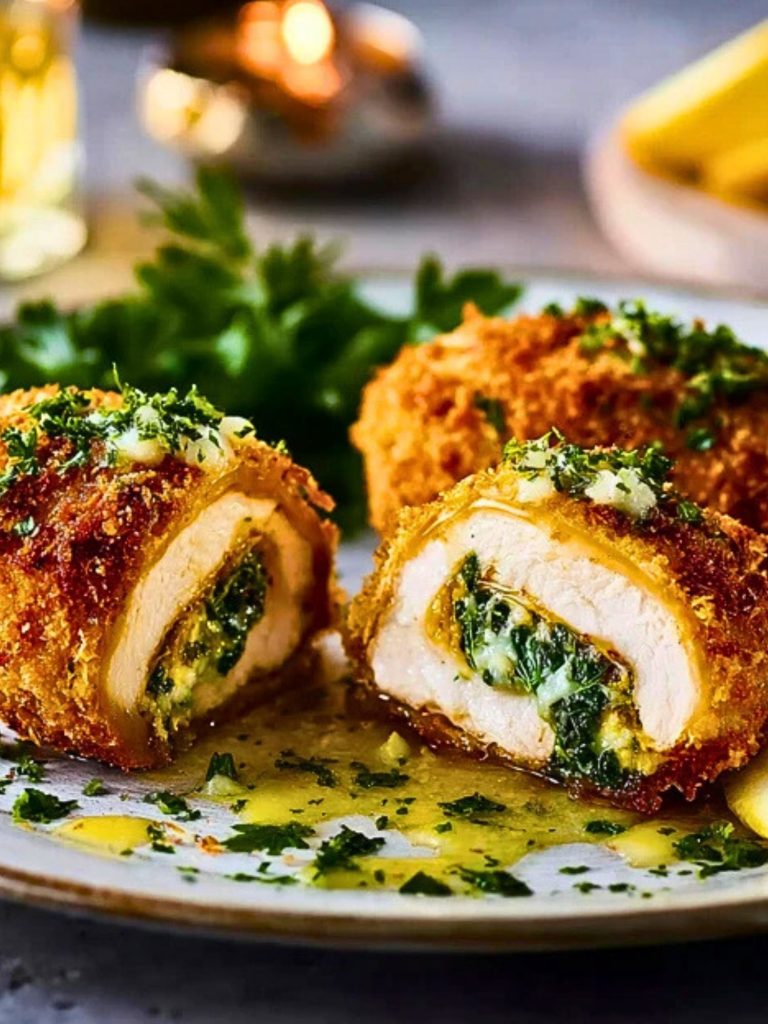
Golden, crispy, and oozing with buttery garlic-herb goodness, Chicken Kiev is the kind of dish that feels fancy yet brings pure comfort. This classic Eastern European favorite features juicy chicken breasts wrapped around a rich garlic-parsley butter, coated in crispy breadcrumbs, and fried or baked to perfection. When you cut into it, the melted butter spills out, infusing every bite with irresistible flavor.
Whether you’re making it for a dinner party or just want to elevate a weeknight meal, Chicken Kiev delivers on all fronts. The crunch, the juiciness, the fragrant garlic butter—it’s a feast for the senses and a celebration of simple, timeless cooking.
Why You’ll Love This Chicken Kiev with Garlic Butter
Chicken Kiev isn’t just another breaded chicken dish. You’ll love it for the dramatic reveal of molten garlic butter when sliced open, the contrast of crispy coating with tender meat, and the homemade touch that’s so much better than any frozen version. It’s a showstopper that’s surprisingly achievable at home and lets you control the quality of ingredients.
Preparation Phase & Tools to Use
To prepare Chicken Kiev, you’ll need a sharp knife for creating a pocket in the chicken, a meat mallet to pound the breasts evenly, and plastic wrap to help roll the chicken without tearing. Mixing bowls are essential for prepping the herb butter and the breading station. Lastly, a frying pan or an ovenproof skillet ensures a perfect golden crust. Each tool plays a crucial role: the knife shapes, the mallet tenderizes, the wrap helps roll, and the skillet crisps it all to perfection.
Ingredients for the Chicken Kiev with Garlic Butter
- Chicken breasts: The star of the dish, providing a tender, juicy base to wrap around the garlic butter.
- Unsalted butter: Brings creamy richness and carries the garlic and herbs into every bite.
- Garlic cloves: Essential for the signature garlic punch.
- Fresh parsley: Adds brightness and color to the butter filling.
- Breadcrumbs: Create the crisp, golden crust that contrasts beautifully with the soft chicken.
- Eggs: Help bind the breadcrumbs to the chicken.
- Flour: Provides a base layer for the egg and breadcrumbs to cling to.
- Salt and pepper: Simple seasonings that elevate the flavors.

How To Make the Chicken Kiev with Garlic Butter
Step 1: Make the Garlic Butter
Mix softened butter with minced garlic, chopped parsley, salt, and pepper. Roll it into a log using plastic wrap and freeze until firm.
Step 2: Prepare the Chicken
Slice each chicken breast horizontally to create a pocket, or pound it thin between plastic wrap. Place a piece of frozen garlic butter in the center and roll the chicken tightly, securing the ends.
Step 3: Bread the Chicken
Dredge each chicken roll in flour, dip in beaten egg, then coat in breadcrumbs. For extra crunch, you can repeat the egg and breadcrumb step.
Step 4: Cook to Perfection
Either shallow fry in oil until golden brown and finish in the oven, or bake entirely in the oven at 400°F (200°C) until the chicken is cooked through and the crust is crisp.
Step 5: Rest and Serve
Let the Chicken Kiev rest for a few minutes before slicing, allowing the juices and butter to settle inside.
Serving and Storing Chicken Kiev with Garlic Butter
Serve Chicken Kiev hot, ideally with a squeeze of fresh lemon and a sprinkle of chopped parsley. It pairs wonderfully with mashed potatoes, steamed vegetables, or a light green salad to balance the richness. For storing, place leftovers in an airtight container in the fridge for up to 2 days. Reheat in the oven to maintain the crispy exterior—avoid the microwave to prevent sogginess.
Frequently Asked Questions
How do I keep the butter from leaking out?
Freeze the garlic butter solid before stuffing, and make sure to seal the chicken edges tightly when rolling. Double breading can also help create a better seal.
Can I bake instead of fry?
Yes! Bake at 400°F (200°C) for 20-25 minutes or until golden and cooked through. For extra crispness, spray the breaded chicken lightly with oil before baking.
Can I prepare Chicken Kiev in advance?
Absolutely. Assemble and bread the chicken rolls, then refrigerate for up to a day or freeze them. Cook straight from frozen, adding extra baking time.
What can I use instead of parsley?
You can swap parsley with chives, dill, or even a touch of tarragon for a different herbal note.
Why is it called Chicken Kiev?
Named after the capital of Ukraine, Chicken Kiev is believed to have been popularized in Russian and Ukrainian kitchens, though its exact origin is still debated.
Want More Chicken Dinner Ideas?
If you’re loving this Chicken Kiev, you’ll definitely want to check out these other delicious chicken recipes:
- Cheesy Garlic Chicken Wraps for an easy, melty weekday dinner.
- Golden Crispy Chicken with Parmesan Mushroom Sauce if you crave creamy, savory flavors.
- Tzatziki Chicken Veggie Naan Pizza for a Mediterranean-inspired twist.
- Honey Pepper Chicken Mac and Cheese when you want comfort food with a kick.
- Bang Bang Chicken for a spicy, saucy crowd-pleaser.
Save This Pin For Later
📌 Save this Chicken Kiev with Garlic Butter to your Pinterest dinner board so you can come back to it any time.
And let me know in the comments how yours turned out! Did you go classic or put your own spin on the filling? I love hearing your tweaks and tips—let’s keep inspiring each other in the kitchen.
For more of my daily recipes, visit my Pinterest page: Kitchen By Kate.
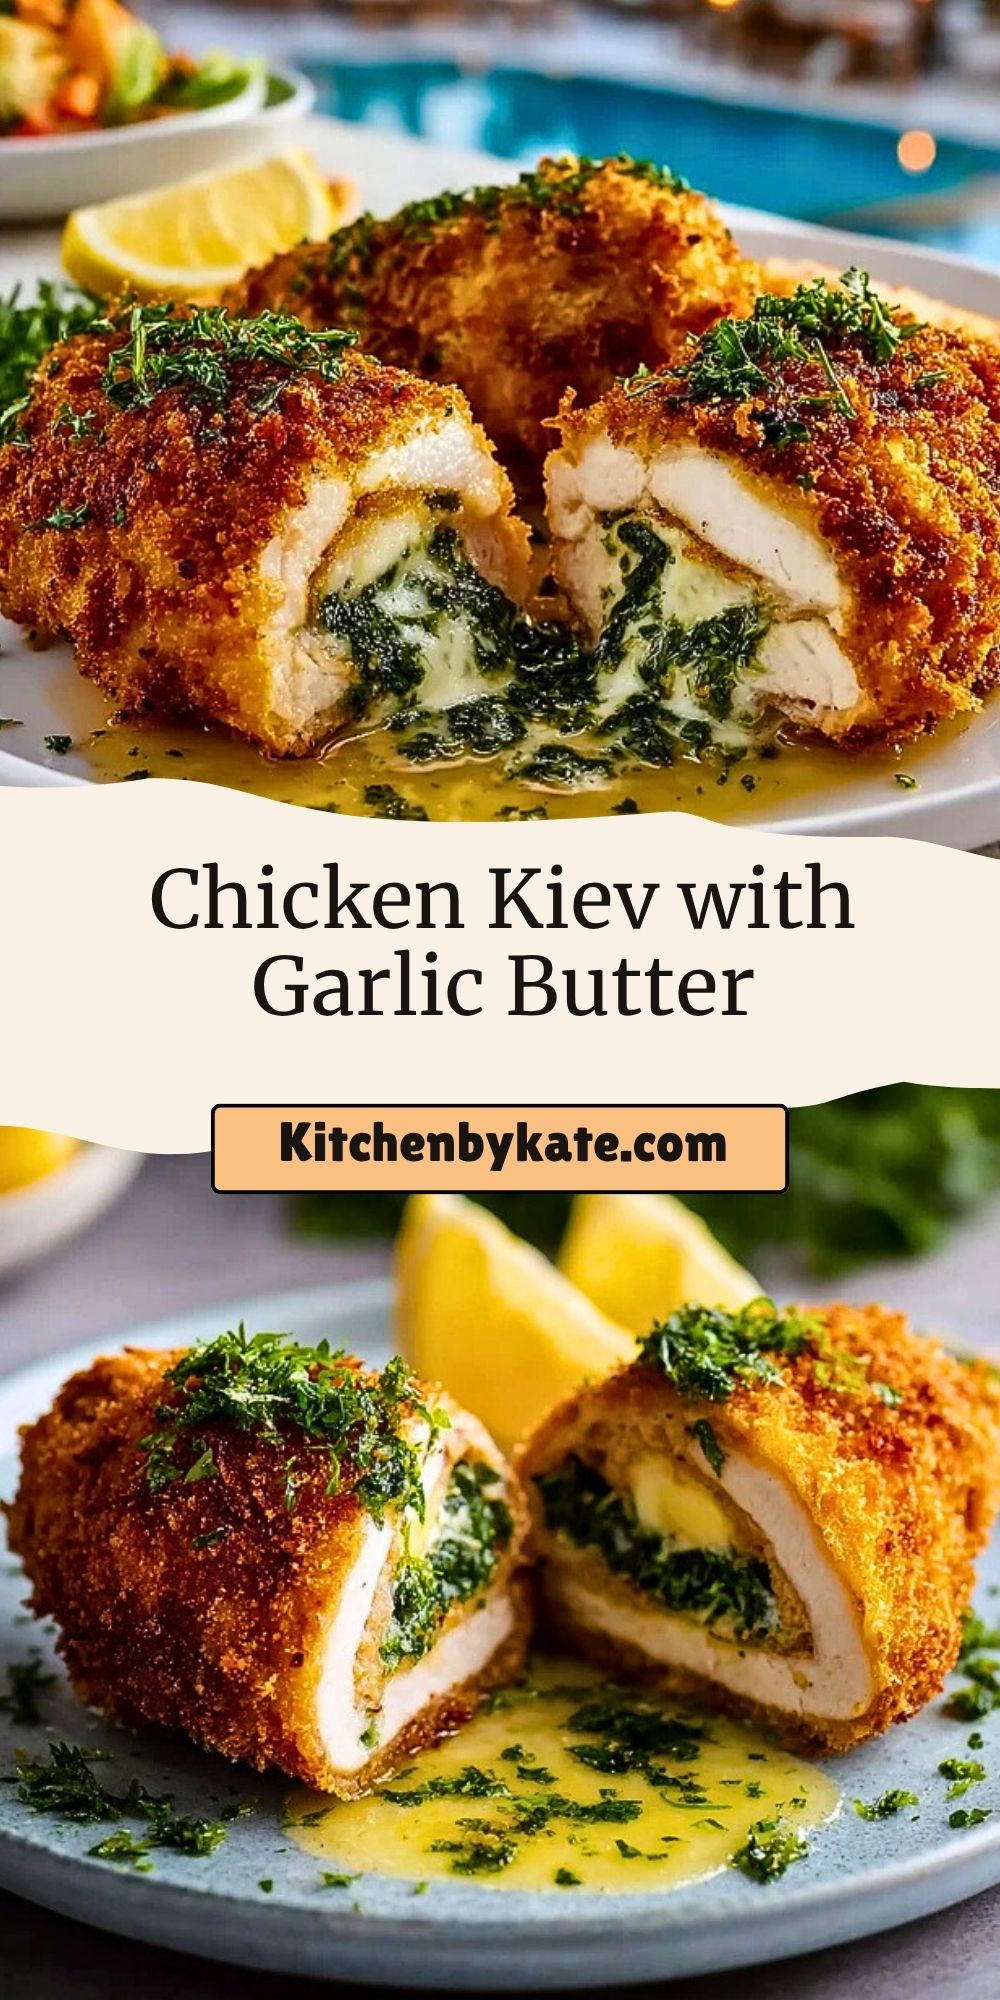

Chicken Kiev with Garlic Butter
- Total Time: 45 minutes
- Yield: 2 servings
Description
This Chicken Kiev with Garlic Butter recipe is a crispy, juicy chicken dish stuffed with garlicky herb butter, perfect for dinner parties or indulgent weeknights. Learn how to make the best homemade Chicken Kiev, with tips, FAQs, and storage instructions.
Ingredients
2 large chicken breasts
6 tablespoons unsalted butter
3 cloves garlic, minced
2 tablespoons fresh parsley, chopped
1 cup breadcrumbs
2 eggs, beaten
1/2 cup all-purpose flour
1 teaspoon salt
1/2 teaspoon black pepper
Vegetable oil, for frying (if shallow frying)
Instructions
1. Mix softened butter with minced garlic, parsley, salt, and pepper. Roll into a log using plastic wrap and freeze until firm.
2. Slice each chicken breast horizontally to make a pocket or pound thin. Place a piece of frozen garlic butter in the center and roll tightly, sealing the ends.
3. Dredge each chicken roll in flour, then dip in beaten egg, and coat in breadcrumbs. For extra crunch, repeat the egg and breadcrumb step.
4. Shallow fry in oil until golden brown, then finish in a 400°F (200°C) oven until cooked through; or bake entirely at 400°F (200°C) until crisp and done.
5. Let rest for a few minutes before slicing to keep the butter and juices inside.
Notes
Freeze the garlic butter solid to prevent leaks.
Double breading gives extra crunch and helps seal in the filling.
Rest the cooked chicken before slicing to avoid butter spills.
- Prep Time: 20 minutes
- Cook Time: 25 minutes
- Category: Main Dish
Nutrition
- Calories: 550 kcal
- Sugar: 1 g
- Sodium: 650 mg
- Fat: 34 g
- Saturated Fat: 15 g
- Unsaturated Fat: 16 g
- Trans Fat: 0 g
- Carbohydrates: 25 g
- Fiber: 1 g
- Protein: 38 g
- Cholesterol: 220 mg