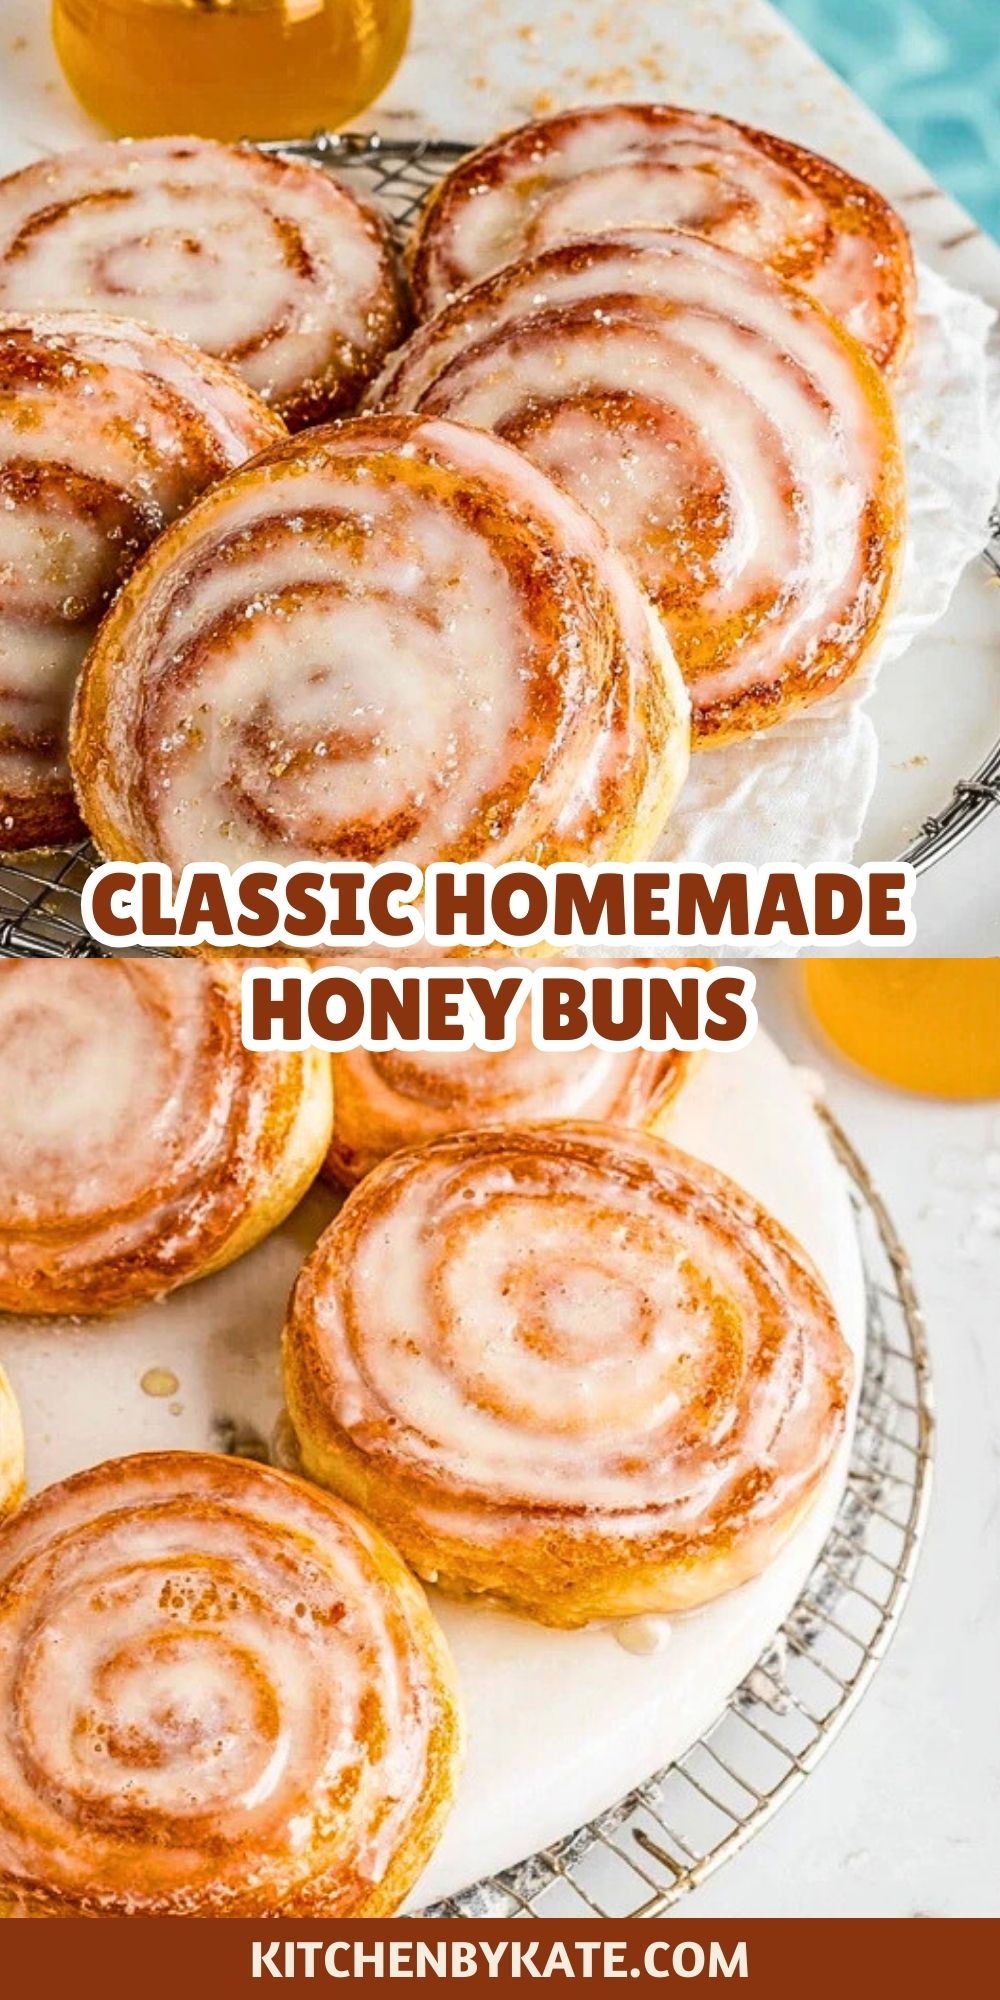


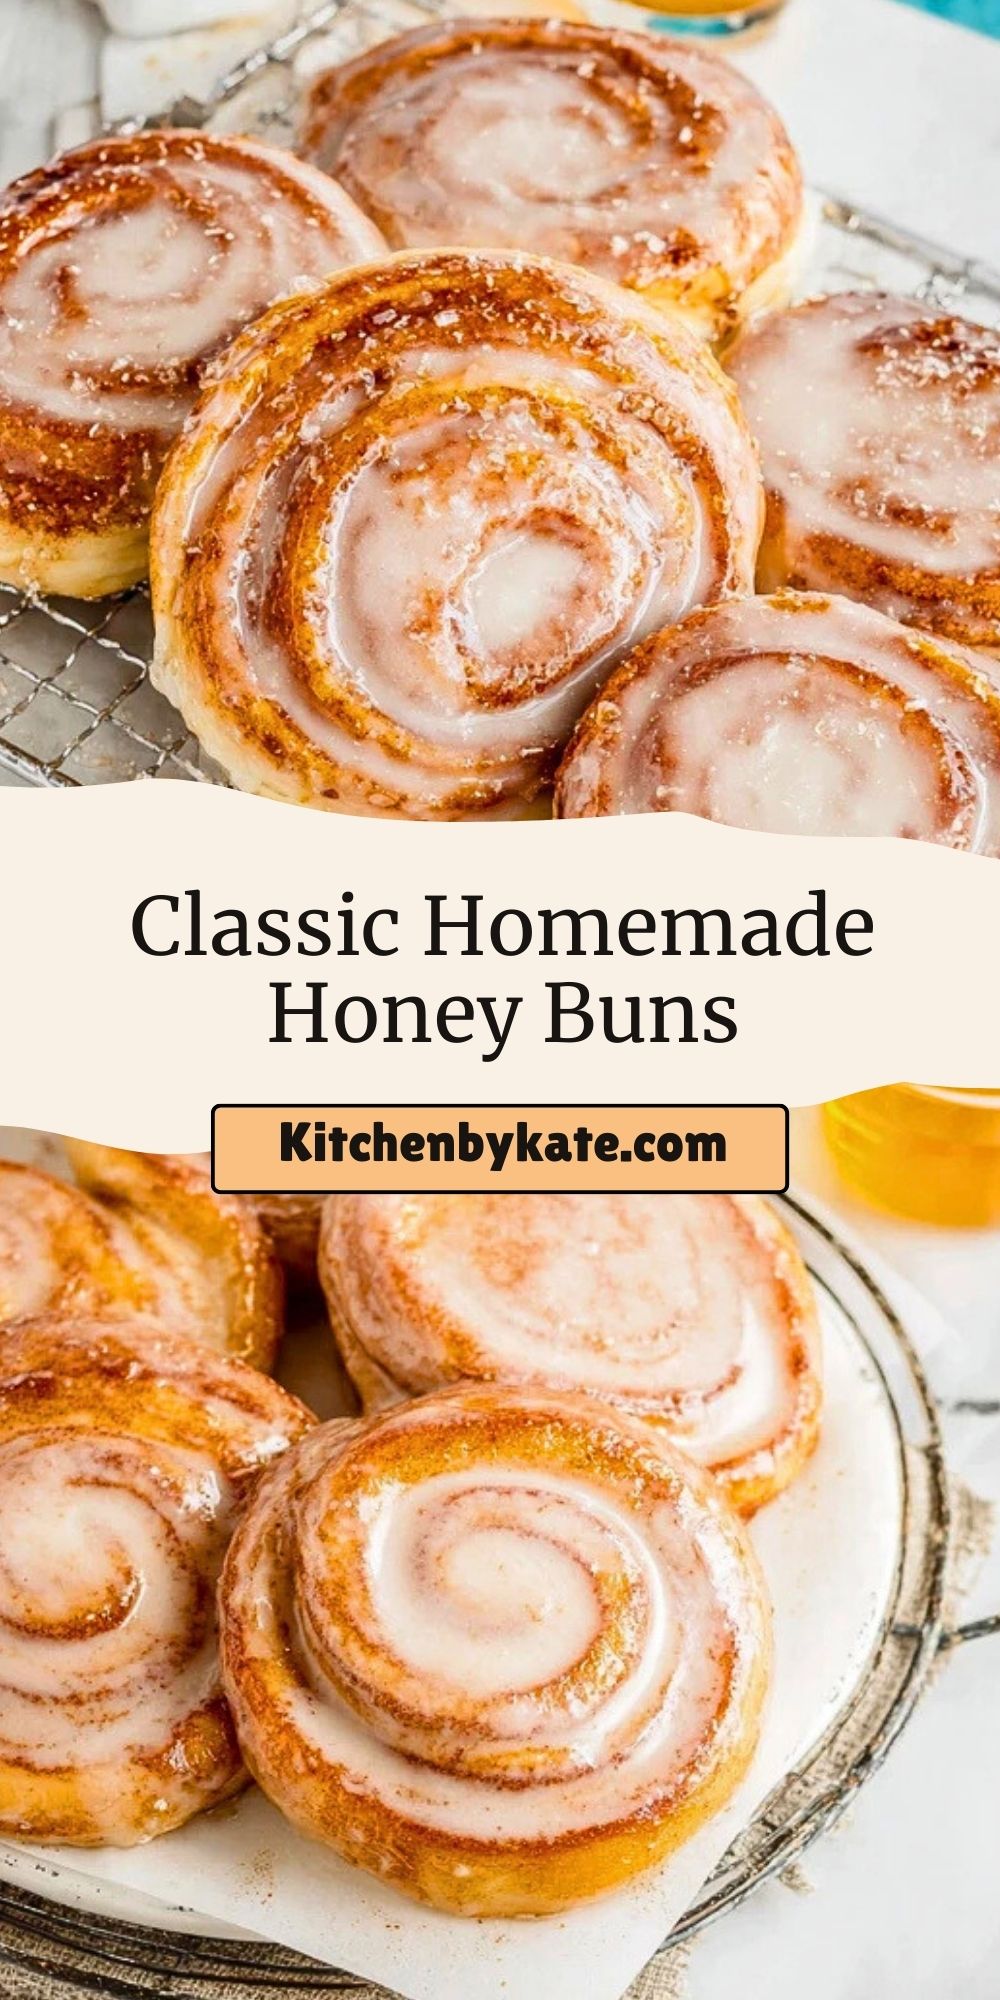
Soft, fluffy, and glazed with just the right amount of sweetness, these Classic Homemade Honey Buns are the kind of nostalgic treat that instantly transports you to simpler mornings. Whether you grew up snagging these from the corner store or you’ve only ever tasted them from a package, making them from scratch brings a whole new level of comfort and satisfaction. Each bite melts in your mouth, filled with warm cinnamon swirls and a glossy honey glaze that’s irresistibly sticky and delightful.
Homemade honey buns aren’t just delicious—they’re a baking experience. From the dough’s gentle rise to the warm, aromatic scent that fills your kitchen, the process is as rewarding as the final product. Perfect for brunches, lazy weekend mornings, or whenever you want to share a treat that feels both familiar and extraordinary. Once you’ve had them fresh from the oven, there’s no going back.
Why You’ll Love This Classic Homemade Honey Buns
These honey buns are everything a comfort food should be: soft, sweet, and soul-soothing. Unlike store-bought versions, you control the ingredients, resulting in a fresher, richer flavor profile.
- Better Than Packaged: No preservatives or artificial flavors—just buttery dough and real honey.
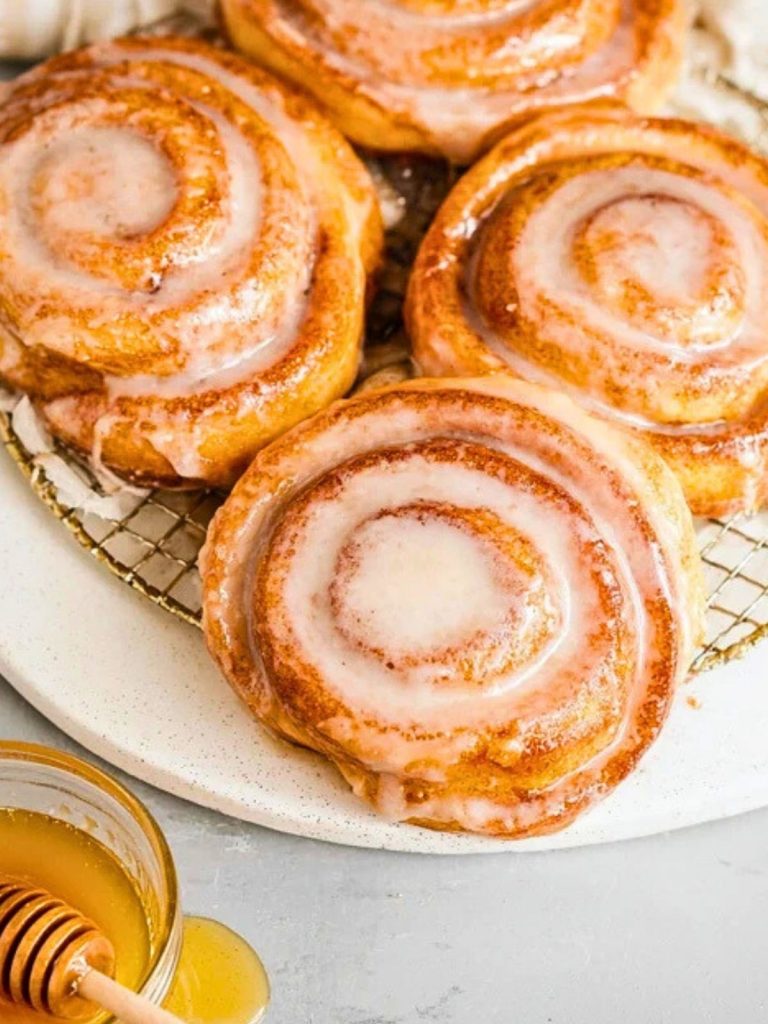
- Perfect Texture: A golden, tender roll with gooey cinnamon layers and a sticky glaze.
- Family Favorite: Loved by kids and grown-ups alike. These make any morning special.
- Freezer Friendly: You can make a batch ahead and freeze for busy mornings or surprise guests.
Preparation Phase & Tools to Use
Before you get your hands into dough, make sure your kitchen is stocked with a few essentials. Preparation is key to making these honey buns a breeze from start to finish.
Essential Tools and Equipment:
- Stand Mixer with Dough Hook: Speeds up kneading, ensuring a smooth, elastic dough.
- Rolling Pin: Helps evenly spread the dough to the perfect thickness for rolling.
- Pastry Brush: For applying melted butter or honey before baking.
- Sharp Knife or Dental Floss: For slicing clean, uniform buns without smashing them.
- Baking Sheet with Parchment Paper: Prevents sticking and promotes even baking.
- Cooling Rack: Allows the buns to cool properly and glaze to set perfectly.
Each of these tools plays a crucial role in shaping the buns, achieving the ideal texture, and creating that irresistible sticky glaze. Don’t skip the cooling rack—it’s the secret to a crisp-but-tender finish.

Ingredients for the Classic Homemade Honey Buns
- All-purpose flour – Provides the base structure for the dough.
- Whole milk – Adds richness and moisture to the dough.
- Active dry yeast – Helps the dough rise, creating a fluffy texture.
- Granulated sugar – Sweetens the dough just enough to balance the glaze.
- Salt – Enhances flavor and strengthens the dough.
- Eggs – Bind the ingredients and add richness.
- Unsalted butter – Infuses the dough and filling with buttery flavor.
- Ground cinnamon – Essential for that classic cinnamon swirl inside.
- Honey – Used for the glaze, it gives the buns their iconic sticky finish.
- Powdered sugar – Combines with milk or water to create a smooth icing.
Each ingredient brings balance, from fluffy bread to sweet glaze, making the honey buns a perfect harmony of flavor and texture.
How To Make the Classic Homemade Honey Buns
Step 1: Make the Dough
Warm the milk slightly and combine it with sugar and yeast. Let it sit for 5–10 minutes until bubbly. Add in melted butter, eggs, and salt. Slowly mix in the flour until a soft dough forms.
Step 2: Knead and Let Rise
Use a stand mixer with a dough hook to knead the dough for about 5–6 minutes until smooth. Cover the bowl and let it rise in a warm place for 1 hour, or until doubled in size.
Step 3: Roll and Fill
Roll the dough into a large rectangle on a floured surface. Brush with melted butter and sprinkle with a cinnamon-sugar mix. Roll it up tightly from the long side, then slice into 1-inch rounds.
Step 4: Second Rise
Place the buns on a parchment-lined baking sheet. Cover and let them rise for another 30 minutes until puffy.
Step 5: Bake to Golden Perfection
Preheat oven to 350°F (175°C). Bake for 15–18 minutes or until golden brown.
Step 6: Glaze It Up
While the buns are warm, whisk together honey, powdered sugar, and a splash of milk to create the glaze. Pour it generously over the buns and let it set slightly before serving.
How to Serve and Store Your Honey Buns
Serving Tips: Serve these warm right out of the oven for the ultimate gooey experience. You can also microwave leftovers for about 10 seconds to bring back that just-baked feel. Pair them with coffee, milk, or a fruity tea.
Storing Tips: Store cooled honey buns in an airtight container at room temperature for up to 3 days. To keep longer, freeze individually wrapped buns for up to 2 months. Reheat in the microwave or toaster oven.
Frequently Asked Questions
How long do honey buns stay fresh?
They’re best eaten fresh but will stay good for up to 3 days in an airtight container.
Can I make the dough ahead of time?
Yes! After the first rise, refrigerate the dough overnight and continue the next day.
Can I skip the glaze?
You could, but that sticky honey glaze is what makes them shine! Try a simple icing if preferred.
Can I make them without a stand mixer?
Definitely. Knead by hand for about 10 minutes until smooth and elastic.
Why is my dough not rising?
Make sure your yeast is active and your milk isn’t too hot—both can affect rise.
What can I use instead of honey?
Maple syrup or agave syrup make good substitutes with slightly different flavors.
Want More Sweet Treat Ideas?
If you love these Classic Homemade Honey Buns, check out more irresistible baked creations:
- Honey Butter Sweet Alabama Pecan Bread
- Cinnamon Sugar French Toast Muffins
- Bonnie’s Blue Ribbon Chocolate Dream Cake
- Strawberry Cheesecake Dump Cake
- Reese’s Peanut Butter Banana Bread
Save This Pin For Later
📌 Save this recipe to your Pinterest dessert board so you can come back to it any time.
And let me know in the comments how yours turned out. Did you add a twist? Maybe a drizzle of chocolate or a sprinkle of nuts?
I love hearing how others make these recipes their own. Questions are welcome too—let’s help each other bake smarter.
For more cozy bakes and sweet breakfast ideas, visit my Pinterest: Kitchen By Kate

Classic Homemade Honey Buns
- Total Time: 1 hour 58 minutes
- Yield: 12 buns
- Diet: Vegetarian
Description
These Classic Homemade Honey Buns are soft, cinnamon-swirled pastries topped with a sticky honey glaze—perfect for breakfast or dessert. Made from scratch, this comforting bakery-style treat is better than store-bought and free of preservatives. Great for freezing and reheating. Ideal for brunches, holidays, or cozy weekends.
Ingredients
1 cup whole milk
2 ¼ teaspoons active dry yeast
⅓ cup granulated sugar
½ teaspoon salt
2 large eggs
¼ cup unsalted butter, melted (for dough)
3 ¾ cups all-purpose flour
¼ cup unsalted butter, melted (for filling)
2 teaspoons ground cinnamon
¼ cup granulated sugar (for filling)
⅓ cup honey
1 cup powdered sugar
2 tablespoons milk (for glaze)
Instructions
1. Warm the milk slightly and combine it with ⅓ cup sugar and yeast. Let sit for 5–10 minutes until bubbly.
2. Add melted butter, eggs, and salt to the mixture. Gradually stir in flour until a soft dough forms.
3. Knead using a stand mixer for 5–6 minutes or by hand for 10 minutes until smooth.
4. Cover and let the dough rise in a warm place for 1 hour, or until doubled in size.
5. Roll dough into a large rectangle on a floured surface. Brush with melted butter and sprinkle with cinnamon sugar.
6. Roll up tightly from the long edge and cut into 1-inch slices.
7. Arrange buns on a parchment-lined baking sheet. Cover and let rise for another 30 minutes.
8. Bake at 350°F (175°C) for 15–18 minutes or until golden.
9. Mix honey, powdered sugar, and milk to form glaze. Pour over warm buns and let it set.
Notes
Let the dough rise fully before baking for a fluffy texture.
Use dental floss to slice the rolled dough cleanly without flattening.
Warm leftover buns briefly in the microwave to restore freshness.
- Prep Time: 1 hour 40 minutes
- Cook Time: 18 minutes
- Category: Breakfast or Dessert
- Method: Baking
- Cuisine: American
Nutrition
- Serving Size: 1 bun
- Calories: 280
- Sugar: 18g
- Sodium: 120mg
- Fat: 9g
- Saturated Fat: 5g
- Unsaturated Fat: 3g
- Trans Fat: 0g
- Carbohydrates: 42g
- Fiber: 1g
- Protein: 5g
- Cholesterol: 45mg