


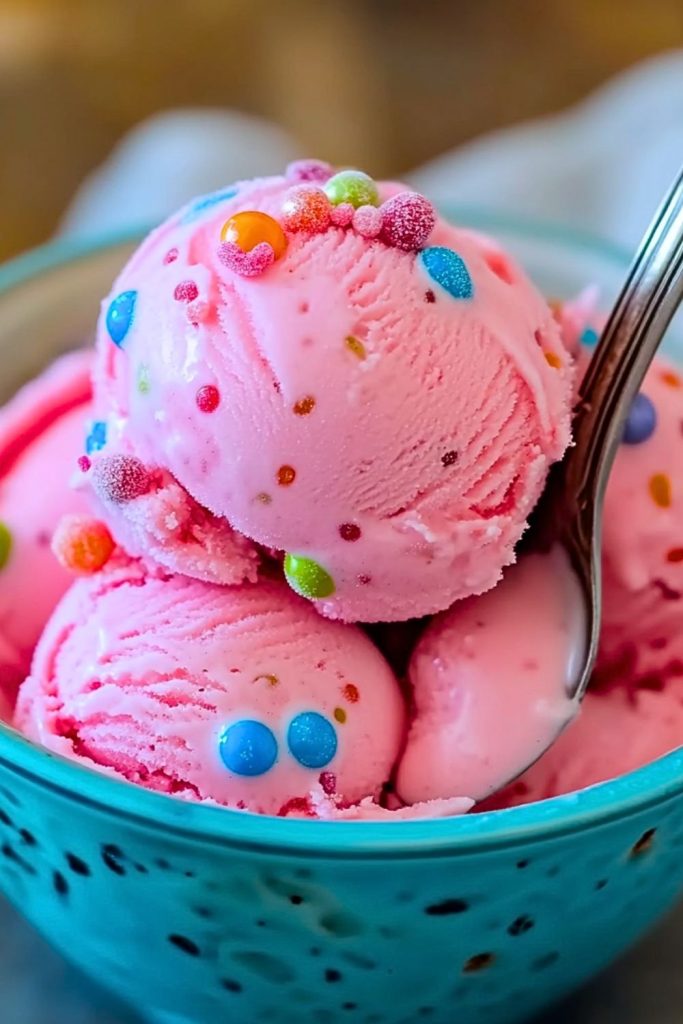
Bright, fun, and full of childhood nostalgia, this Creamy Homemade Bubblegum Ice Cream is the ultimate sweet treat for kids and the young at heart. With its pastel swirls of pink, yellow, and blue, it’s as beautiful to look at as it is delicious to eat. The rich, velvety base is churned to perfection, while bursts of bubblegum flavor and crunchy candy pieces bring playful excitement to every bite.


Perfect for parties, summer gatherings, or whenever you’re craving something whimsical, this ice cream doesn’t just taste amazing—it brings joy in every scoop. Whether served in a cone, bowl, or straight from the tub, it’s a guaranteed hit. Let’s explore what makes this creamy treat such a delight to make and enjoy.
What Kind of Bubblegum Flavor Should I Use?
The signature taste of bubblegum ice cream is that nostalgic blend of banana, strawberry, and a hint of vanilla often found in classic bubblegum. To achieve that, you can use a bubblegum-flavored extract available at baking supply stores or online. Some recipes call for melting down actual bubblegum pieces, but extracts provide a cleaner, more consistent flavor and texture. Choose one that’s artificial-free if you prefer a more natural option.
Ingredients for the Creamy Homemade Bubblegum Ice Cream
- Heavy Cream – Provides the rich, creamy texture that makes the ice cream luxuriously smooth.
- Whole Milk – Balances the heaviness of the cream and helps with the perfect churn.
- Sugar – Adds just the right sweetness to enhance the bubblegum flavor.
- Egg Yolks – Used to create a silky custard base, giving the ice cream its luscious consistency.
- Bubblegum Extract – The star ingredient that gives the ice cream its playful and nostalgic flavor.
- Pink, Yellow, and Blue Food Coloring – Creates the iconic pastel swirls for that bubblegum shop look.
- Candy-Coated Bubblegum Balls or Mini Gumballs – Mixed in for chewy, colorful surprises in every scoop.
- Salt – A tiny pinch enhances and balances the sweetness.
How To Make the Creamy Homemade Bubblegum Ice Cream
Step 1: Prepare the Custard Base
In a medium saucepan over medium heat, warm the milk, heavy cream, and half the sugar until it begins to steam—but not boil. Meanwhile, in a separate bowl, whisk together the egg yolks and remaining sugar until pale and slightly thickened.
Step 2: Temper the Eggs
Slowly pour a small amount of the hot milk mixture into the egg yolks, whisking constantly to prevent curdling. Gradually add more until about half of the milk mixture is incorporated. Then, return everything to the saucepan.
Step 3: Cook Until Thickened
Cook the combined mixture over low heat, stirring constantly, until it thickens enough to coat the back of a spoon (about 170–175°F or 77–80°C). Do not boil. Once thickened, remove from heat.
Step 4: Add Flavor and Chill
Strain the custard through a fine mesh sieve into a clean bowl. Stir in the bubblegum extract and a small pinch of salt. Let it cool slightly, then cover and chill in the refrigerator for at least 4 hours, preferably overnight.
Step 5: Churn the Ice Cream
Once fully chilled, pour the custard into your ice cream maker and churn according to the manufacturer’s instructions. When the ice cream starts to thicken but is still soft, divide it into three bowls.
Step 6: Color and Swirl
Add a few drops of pink, yellow, and blue food coloring to each bowl and gently fold to create pastel colors. Spoon the colored mixtures alternately into a container, then swirl with a knife for a marbled effect.
Step 7: Add the Candy Pieces
Just before transferring the ice cream to the freezer, fold in the candy-coated bubblegum balls or mini gumballs. Freeze the container for at least 4–6 hours until firm.
Serving and Storing Your Creamy Homemade Bubblegum Ice Cream
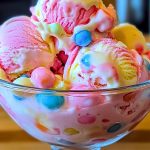
Serve your bubblegum ice cream in classic glass dessert bowls or fun waffle cones to showcase its swirled colors. For added flair, top with extra bubblegum balls, whipped cream, or even edible glitter. It’s a crowd-pleaser for birthday parties and themed events!
To store, place the ice cream in an airtight, freezer-safe container. Press a layer of parchment paper or plastic wrap directly onto the surface before sealing with the lid to prevent ice crystals. It will keep fresh for up to 2 weeks in the freezer, though it’s likely to disappear much sooner!
Frequently Asked Questions
How long does homemade ice cream last in the freezer?
For best taste and texture, enjoy within 2 weeks. After that, it may begin to develop ice crystals and lose creaminess.
Can I make this without an ice cream maker?
Yes! After chilling the custard, place it in a freezer-safe container and stir vigorously every 30 minutes for about 3–4 hours to break up ice crystals. It won’t be quite as smooth, but still tasty.
Can I use natural food coloring?
Absolutely. Natural dyes like beet juice, turmeric, and spirulina powder can replicate the colors in a more health-conscious way.
Are the bubblegum candies safe to eat?
If you’re adding traditional bubblegum balls, remind guests they’re chewy and not meant to be swallowed. Alternatively, you can use candy-coated chocolate or leave them out altogether.
Can I make this recipe dairy-free?
You can substitute with full-fat coconut milk and a dairy-free creamer, but the texture may be less creamy. Be sure to use a dairy-free bubblegum flavoring as well.
Is the extract better than using real gum?
Yes—real gum can leave a sticky residue and alter texture. Extracts are easier to use and give a cleaner flavor.
Creamy Homemade Bubblegum Ice Cream Recipe
- Total Time: 0 hours
- Yield: About 1.5 quarts
Description
A playful, creamy frozen treat with nostalgic bubblegum flavor, candy pieces, and beautiful pastel swirls. Perfect for summer parties and childhood-themed desserts.
Ingredients
2 cups heavy cream
1 cup whole milk
3/4 cup granulated sugar (divided)
4 large egg yolks
1 1/2 teaspoons bubblegum extract
Pink, yellow, and blue food coloring
1/2 cup candy-coated bubblegum balls or mini gumballs
Pinch of salt
Instructions
- In a saucepan, warm milk, cream, and half the sugar over medium heat until steaming.
- In a bowl, whisk egg yolks with remaining sugar until pale.
- Slowly temper the eggs with warm milk mixture, then return to pan.
- Cook on low, stirring constantly, until thick enough to coat a spoon (170–175°F).
- Strain mixture, stir in bubblegum extract and salt, and chill for at least 4 hours.
- Churn chilled base in ice cream maker. Divide into 3 bowls and tint with food coloring.
- Alternate colored scoops into a container and swirl gently.
- Fold in candy pieces and freeze for 4–6 hours until firm.
- Prep Time: 30 minutes (plus chilling)
- Chill Time: 4–6 hours
- Cook Time: 10 minutes
- Category: Desserts