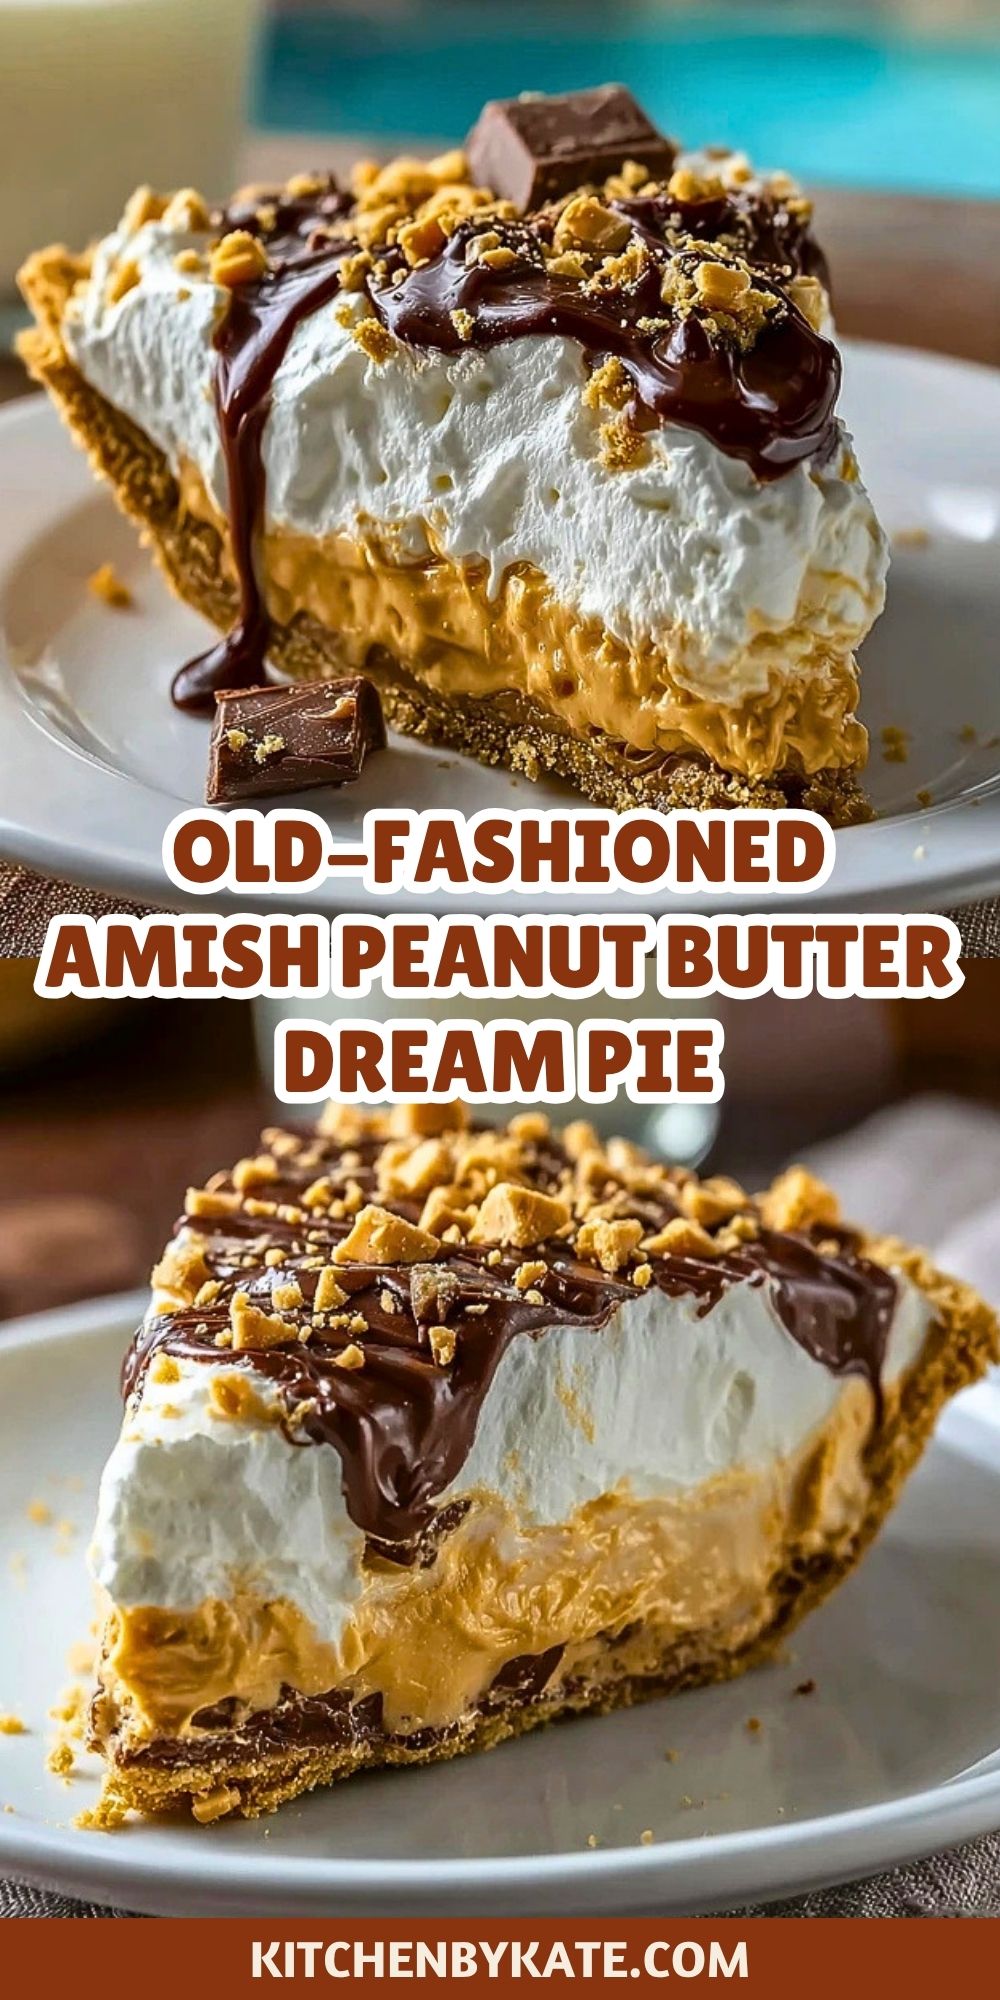
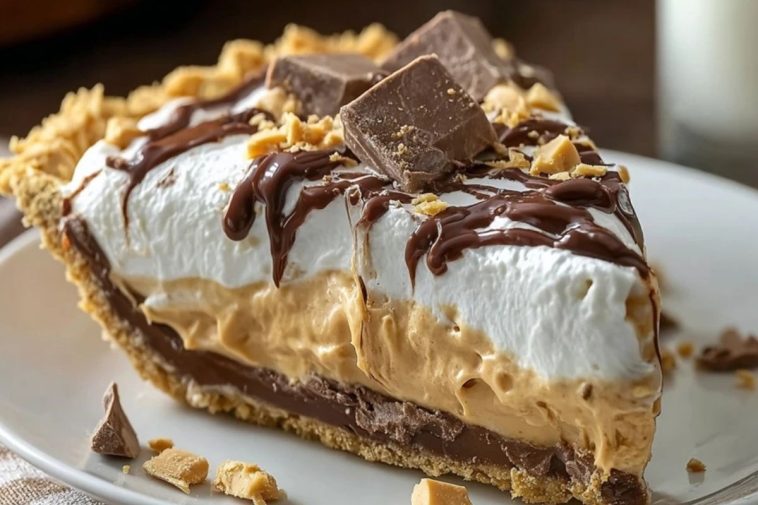

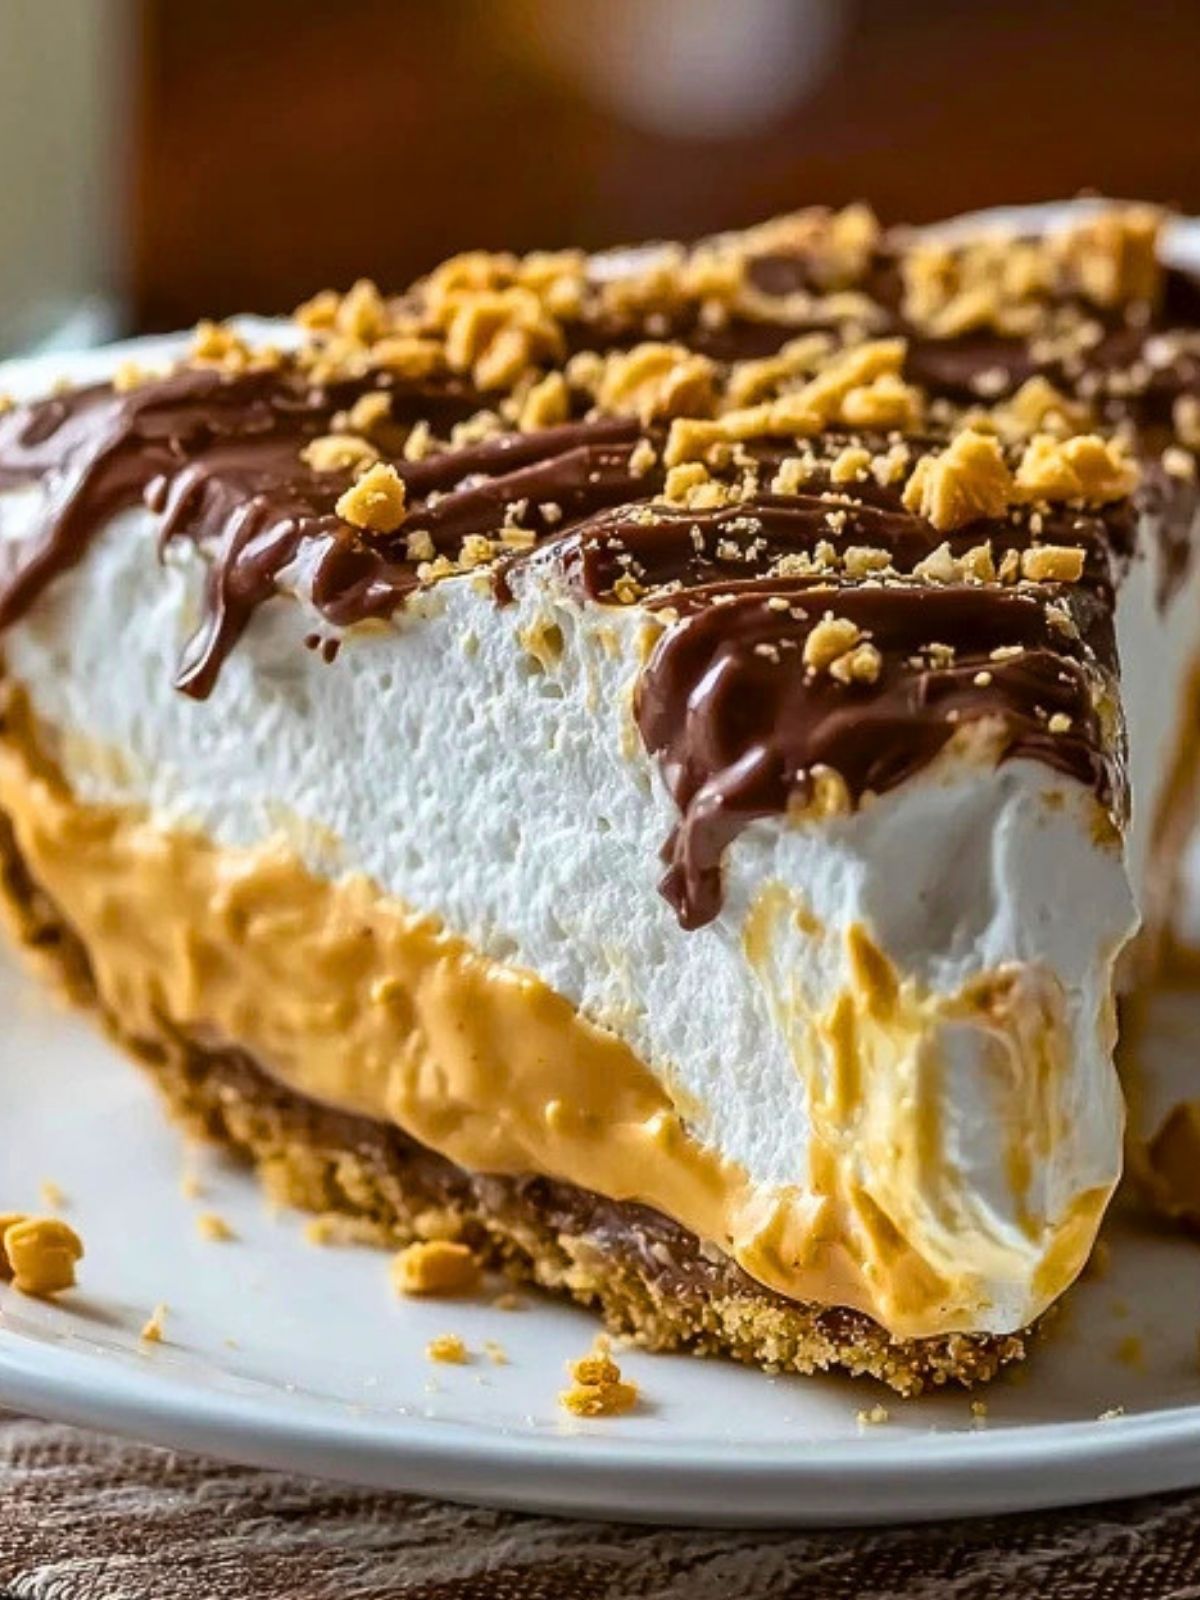
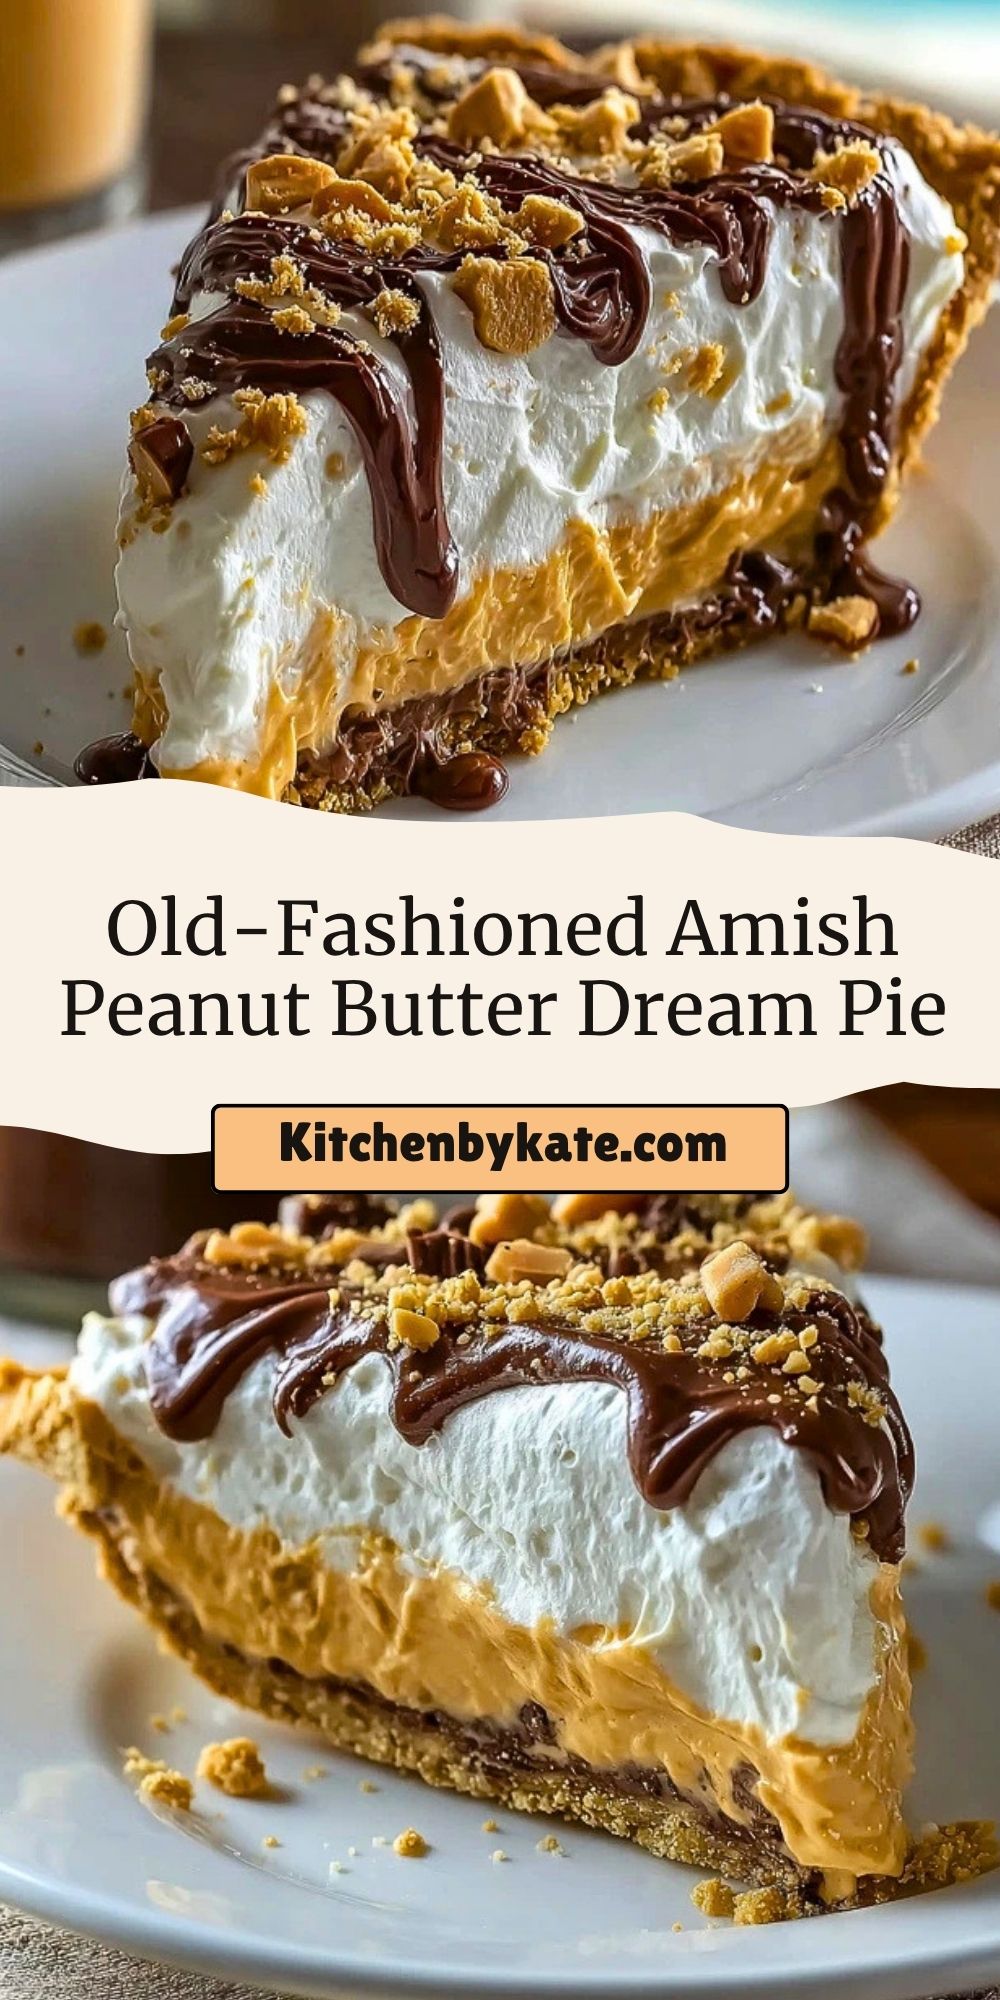
If you’re craving a dessert that wraps up nostalgia, indulgence, and cloud-like creaminess into every single bite, look no further than this Old-Fashioned Amish Peanut Butter Dream Pie. This no-bake delight has the perfect balance of textures: a crunchy graham cracker crust, rich peanut butter filling, light-as-air whipped topping, and a decadent chocolate drizzle to finish. It’s a beloved staple in many Amish and Mennonite communities, often shared at gatherings, holidays, and potlucks.
This dreamy pie is an homage to simplicity and comfort—a recipe passed down through generations that still holds up today. It tastes like a hug from grandma’s kitchen. With just a handful of pantry-friendly ingredients and no oven time required, it’s the ideal dessert for warm days, last-minute dinners, or any moment when you need a sweet escape.
Why You’ll Love This Old-Fashioned Amish Peanut Butter Dream Pie
- No-bake, no stress: Ideal for hot weather or busy kitchens.
- Perfect for peanut butter lovers: Silky, nutty, and rich in every layer.
- Texture heaven: Creamy filling meets crunchy crust and fluffy topping.
- Make-ahead friendly: Great for prepping the day before events.
- Crowd-pleaser: A classic dessert that disappears fast at any party.
Preparation Phase & Tools to Use
Before diving into this decadent dessert, gather your tools. Each one makes a huge difference in creating that signature texture and look:
- Food processor or rolling pin: For crushing graham crackers finely for the crust. A uniform crumb base ensures a solid foundation that won’t fall apart.
- Mixing bowls (at least 2): You’ll need one for the crust and another for the peanut butter filling. Using separate bowls helps keep each layer distinct and smooth.
- Hand mixer or stand mixer: Crucial for whipping the peanut butter filling until it’s velvety and fluffy.
- Rubber spatula: Helps fold ingredients gently without deflating them, especially when working with whipped topping.
- Pie dish (9-inch recommended): A standard pie dish works great to hold all those delicious layers without spillage.
- Microwave-safe bowl: For melting chocolate or peanut butter chips for drizzling over the top.
With your tools ready and ingredients prepped, you’re on your way to building the dreamiest peanut butter pie that would make any Amish grandma proud.

Ingredients for the Old-Fashioned Amish Peanut Butter Dream Pie
- Graham crackers: Crushed to create that sturdy, buttery crust.
- Unsalted butter: Melted and mixed with crumbs to bind the crust together.
- Creamy peanut butter: The heart of this dessert. Choose a smooth, high-quality peanut butter for best flavor.
- Powdered sugar: Adds sweetness and helps thicken the peanut butter mixture.
- Whipped topping (like Cool Whip): Brings the airy, fluffy contrast to the dense filling.
- Cream cheese: Gives body and a touch of tang to the filling.
- Chocolate chips or peanut butter chips (optional): Melted for drizzling or sprinkled on top for visual appeal and added richness.
Each of these ingredients contributes to the layered texture and deep flavor that defines this Amish classic.
How To Make the Old-Fashioned Amish Peanut Butter Dream Pie
Step 1: Build the Crust
Combine crushed graham crackers with melted butter until the mixture resembles wet sand. Press firmly into a pie dish, making sure the bottom and sides are evenly covered. Chill in the refrigerator while you prepare the filling.
Step 2: Create the Peanut Butter Mixture
In a large bowl, beat together the cream cheese, powdered sugar, and peanut butter until smooth and creamy. This step is key for achieving that luscious, mousse-like texture.
Step 3: Fold in the Whipped Topping
Gently fold half of the whipped topping into the peanut butter mixture using a rubber spatula. This lightens the filling while keeping it rich.
Step 4: Layer It All In
Spread the peanut butter mixture into the chilled crust. Then add the remaining whipped topping as a final fluffy layer over the pie.
Step 5: Top It Off
Drizzle melted chocolate or peanut butter chips over the whipped layer. Finish with crushed peanuts or graham crumbs for a little crunch.
Step 6: Chill & Set
Refrigerate for at least 4 hours or until fully set. Overnight is even better for clean slices and full flavor development.
How to Serve and Store This Peanut Butter Dream Pie
Serve slices chilled straight from the fridge for best results. A sharp knife dipped in warm water helps create clean, beautiful cuts.
To store, keep the pie covered in the refrigerator for up to 5 days. If you’re planning ahead, this pie also freezes beautifully—just cover tightly and freeze for up to a month. Thaw in the refrigerator before serving.
Frequently Asked Questions
Can I use crunchy peanut butter instead?
Yes, but the texture will be slightly less smooth. It adds a nutty bite that some people love!
Can I make this pie gluten-free?
Absolutely—just swap in gluten-free graham crackers for the crust.
How do I make this more decadent?
Use a chocolate graham cracker crust, or add a layer of melted chocolate over the crust before adding the peanut butter filling.
Can I make this pie ahead of time?
Yes! This pie is perfect to make a day in advance and refrigerate overnight.
Do I need to bake the crust?
Nope! Once it’s chilled and firm, it’s ready to go. Total no-bake win.
Can I use homemade whipped cream?
Definitely! Just make sure it’s stabilized with a little sugar and perhaps gelatin to hold up over time.
Want More Dessert Ideas with a Twist?
If you loved this peanut butter dream pie, here are more decadent ideas to explore:
- Try this Cinnamon Roll Cheesecake for the perfect breakfast-dessert hybrid.
- Satisfy your sweet tooth with Amish Applesauce Cake for cozy spice flavor.
- For a chocolate-lovers’ dream, check out Bonnies Blue Ribbon Chocolate Dream Cake.
- Want something quick and chewy? Make the Quick and Simple Oatmeal Peanut Butter Chocolate Chip Bars.
- And don’t miss the Pecan Pie Lasagna Recipe for another layer-packed treat.
Save This Pin For Later
📌 Save this recipe to your Pinterest dessert board so you can come back to it any time: Follow me on Pinterest
And let me know in the comments how yours turned out. Did you go for chocolate drizzle or peanut butter chips on top? Did you add crushed pretzels for that salty crunch?
I love hearing how others make these recipes their own. Questions are welcome too—let’s help each other bake smarter.

Old-Fashioned Amish Peanut Butter Dream Pie
- Total Time: 4 hours 20 minutes
- Yield: 8 servings
- Diet: Vegetarian
Description
Dreamy, creamy, and no-bake – this Old-Fashioned Amish Peanut Butter Dream Pie is the ultimate nostalgic dessert. With a rich peanut butter and cream cheese filling, a crunchy graham cracker crust, and a cloud of whipped topping, it’s perfect for potlucks, holidays, or just because. Ideal for peanut butter lovers seeking an easy dessert idea or those looking for quick make-ahead food ideas for gatherings. Great for warm weather when oven-free recipes are a must!
Ingredients
1 1/2 cups graham cracker crumbs
6 tablespoons unsalted butter, melted
1 cup creamy peanut butter
1 cup powdered sugar
8 ounces cream cheese, softened
8 ounces whipped topping (like Cool Whip), divided
1/2 cup chocolate chips or peanut butter chips (optional)
Instructions
1. Combine graham cracker crumbs and melted butter until well mixed. Press into a 9-inch pie dish and refrigerate while preparing filling.
2. In a large mixing bowl, beat peanut butter, powdered sugar, and cream cheese until smooth and creamy.
3. Gently fold in half of the whipped topping until incorporated.
4. Spread peanut butter filling over the chilled crust evenly.
5. Top with the remaining whipped topping, smoothing out the top.
6. Melt chocolate chips or peanut butter chips and drizzle over the top layer. Optionally, garnish with crushed peanuts or additional crumbs.
7. Chill the pie for at least 4 hours (or overnight) until fully set.
8. Slice and serve chilled. Wipe knife between cuts for clean slices.
Notes
For a gluten-free version, simply swap in gluten-free graham crackers.
Let the cream cheese soften at room temperature for easy blending.
Use stabilized whipped cream if substituting for Cool Whip to ensure it holds up.
- Prep Time: 20 minutes
- Cook Time: 0 minutes
- Category: Dessert
- Method: No-Bake
- Cuisine: Amish-Inspired
Nutrition
- Serving Size: 1 slice
- Calories: 470
- Sugar: 23g
- Sodium: 220mg
- Fat: 34g
- Saturated Fat: 13g
- Unsaturated Fat: 18g
- Trans Fat: 0g
- Carbohydrates: 34g
- Fiber: 2g
- Protein: 7g
- Cholesterol: 30mg